Learning how to make a balloon garland at home is honestly one of the best party skills you can pick up — it turns a plain wall into the kind of backdrop people stop to take photos in front of, and it costs a fraction of hiring someone to build it for you.
The good news is you don’t need helium, a fancy pump, or any professional training. All you really need is a balloon strip, some glue dots, and about an hour of patience. This guide walks you through the entire process, from planning your colors to hanging the finished garland without it sagging by evening.
What You’ll Need Before You Start
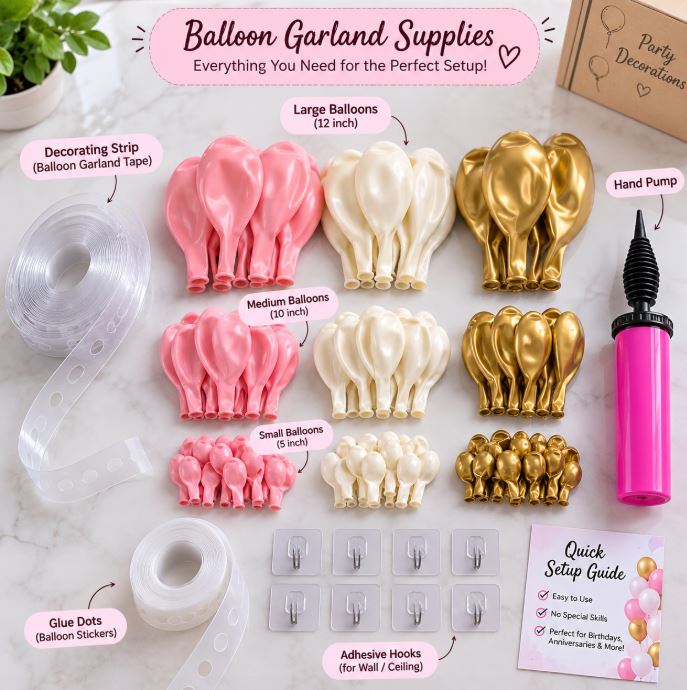
Before you touch a single balloon, get your supplies sorted so you’re not pausing mid-build to search for something.
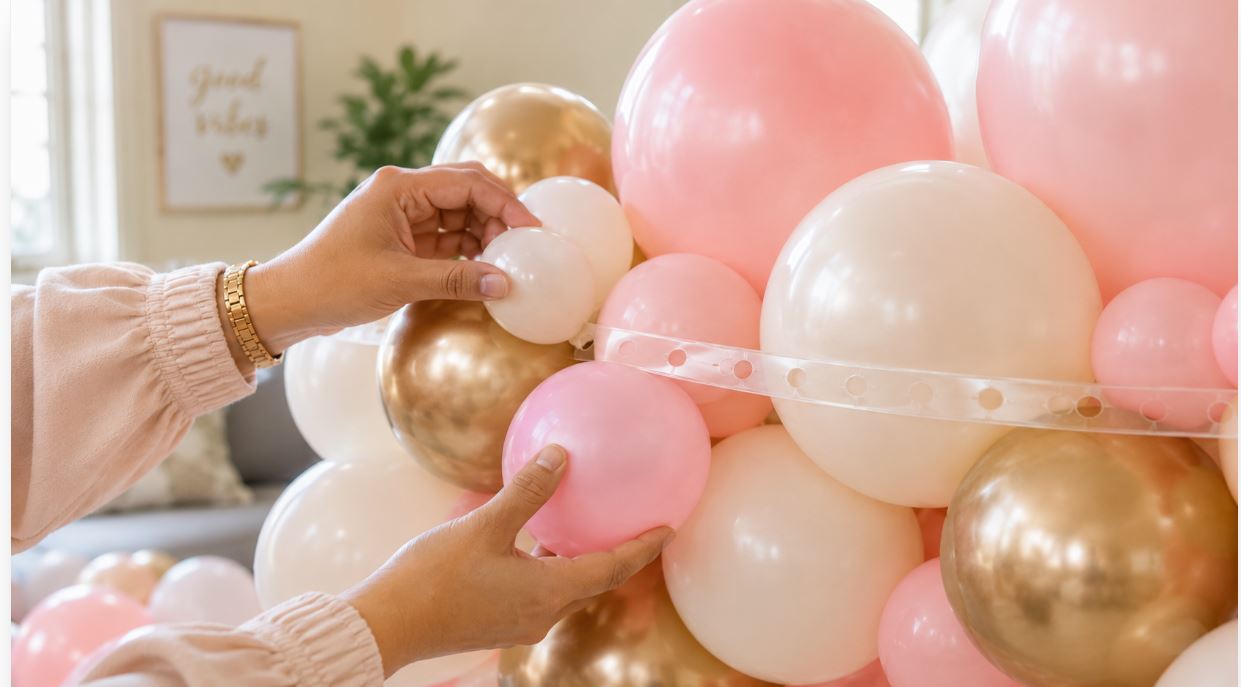
You’ll need a balloon decorating strip (sometimes called a garland tape or chain strip) — this plastic strip has pre-cut holes you tuck the balloon knots into, and it’s what gives the garland its shape. You’ll also need a hand pump. You’re using air, not helium, since air-filled balloons hold their shape just as well for a garland and last longer without floating away.
Grab balloons in at least two or three sizes — mainly 11-inch balloons as your base, with a mix of 5-inch balloons as fillers to add texture. Add a few chrome or confetti balloons if you want that extra shine.
You’ll also need small glue dots (low-temp ones — regular hot glue will pop a latex balloon on contact) to attach the filler balloons, plus sturdy adhesive hooks rated for at least 3 lbs each to mount the finished garland to a wall or ceiling.
Step 1: Plan Your Color Ratio and Shape
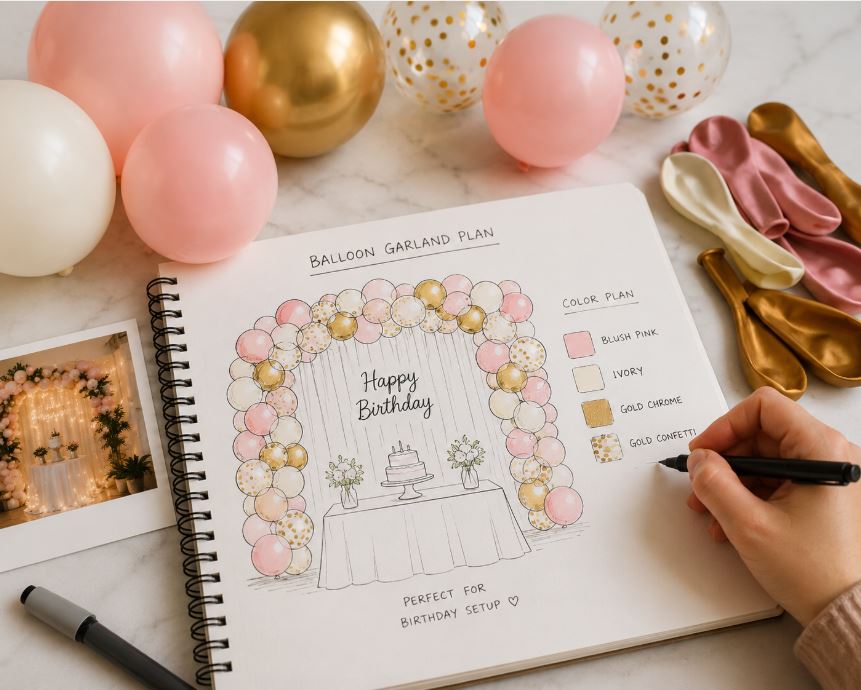
Before inflating anything, decide your color ratio. A good starting formula is 60% your main color, 30% a secondary color, and 10% a metallic accent like chrome gold or silver. This ratio is what makes garlands look intentional instead of a random balloon dump.
Also decide on your shape. A straight garland along a wall is easiest for beginners. An arch needs more planning since you’ll be curving the strip, and you’ll want a slightly longer strip than you think you need — garlands almost always look shorter once fully built and fluffed out.
Measure your space and add about 20% extra length to your strip to account for natural bunching. A 6-foot wall space usually needs a garland strip closer to 7–8 feet.
Sketch it out roughly if it helps, marking where you want denser clusters versus sparser sections. Most organic garlands look better with uneven density — a thicker cluster at one end tapering into a lighter spread — rather than perfectly even spacing throughout.
Step 2: Inflate and Sort Your Balloons
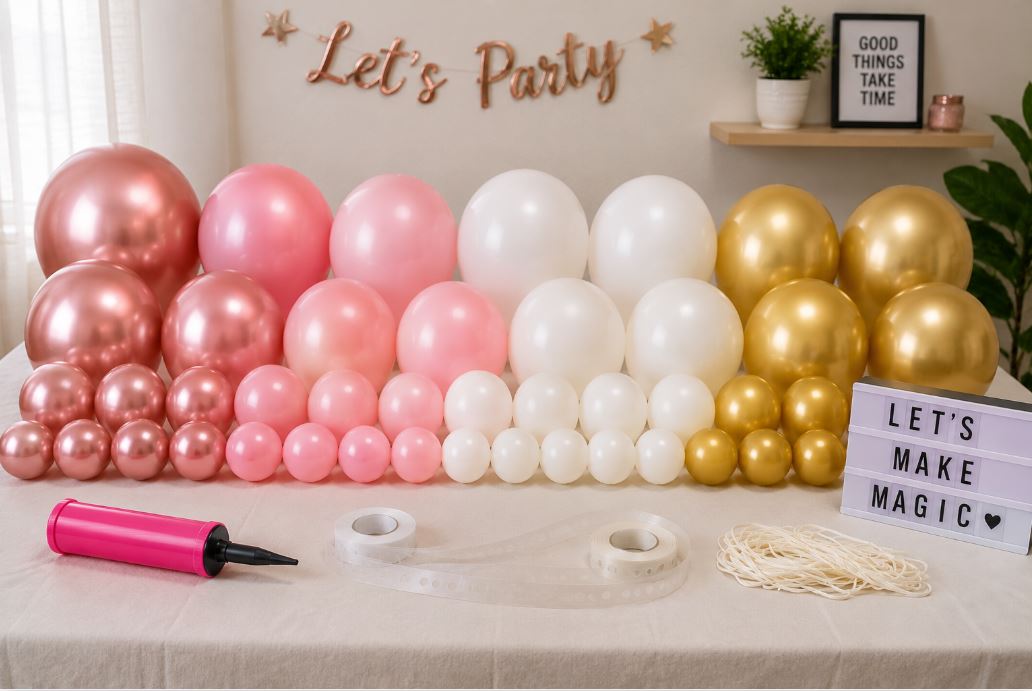
Start inflating your 11-inch balloons first since they form the backbone of the garland. Aim for balloons that are about 90% full rather than fully stretched — slightly underinflated balloons look rounder and fit together more snugly.
Tie off each balloon and sort them by color and size into separate piles as you go. This sounds unnecessary, but it saves a huge amount of time later when you’re trying to grab the right balloon quickly instead of digging through a mixed pile.
Inflate your 5-inch filler balloons next. These don’t go on the strip directly — they’ll be glued into the gaps later to fill out the garland and add texture, so keep them in a separate pile close to your glue dots.
Plan on roughly 16 to 20 balloons of the 11-inch size per foot of finished garland if you want a lush, full look, or closer to 10–12 per foot for a lighter, more minimal style. It’s always better to inflate a few extra than run short halfway through..
Step 3: Build the Strip Section by Section
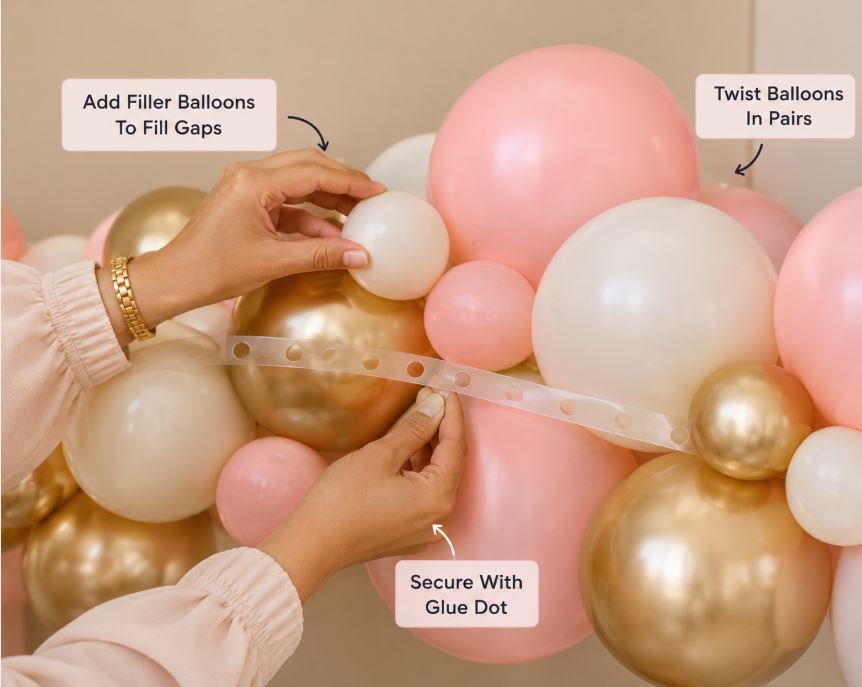
Now the actual assembly. Take two balloons and twist their necks together, then tuck the twisted point into one of the holes on the decorating strip. Repeat with a second pair right next to it, alternating colors according to your planned ratio.
Work in small sections of about 12 inches at a time rather than planning the whole strip at once. This keeps the color distribution looking natural and lets you adjust on the fly if a section looks too heavy on one color.
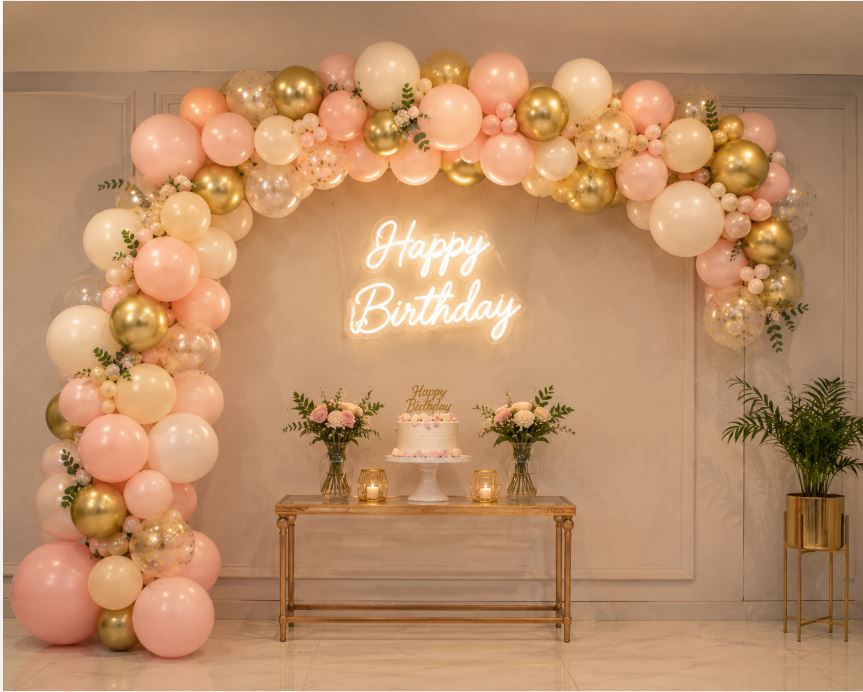
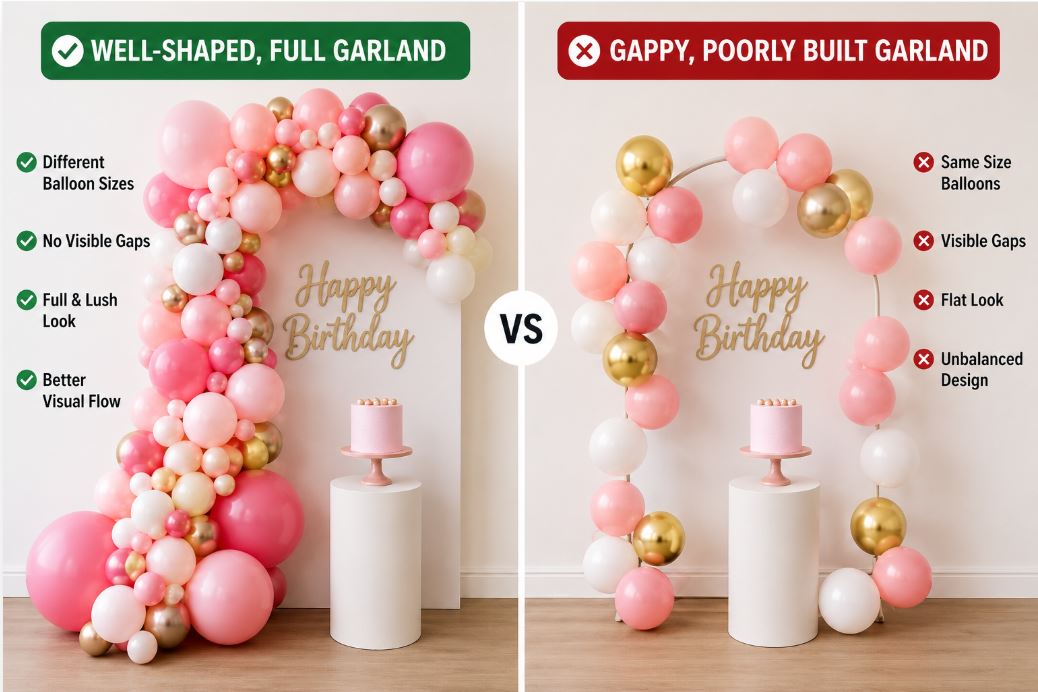
Once your base balloons are attached along the whole strip, go back with your filler balloons and glue dots. Tuck the 5-inch balloons into the gaps between the larger balloons, gluing them lightly to the neighboring balloons rather than the strip itself. This is what gives an organic garland its signature lush, cloud-like texture instead of a flat, uniform look.
Step back and check the strip from a few feet away every so often. It’s easy to get too focused on one section and lose sight of the overall balance.
Step 4: Hang and Shape the Garland
Once your garland is fully assembled, it’s time to hang it. Attach your adhesive hooks to the wall or ceiling first, spacing them roughly every 2 to 3 feet along the intended path — for a 10-foot garland, that’s usually five or six hooks.
Drape the garland strip over the hooks, adjusting as you go so the curve or line looks natural rather than pulled taut. Gently fluff the balloons by hand afterward, twisting a few filler balloons slightly outward to fill any visible gaps.
If you’re building an arch shape, this is where the shaping really comes together — gently bend the garland as you attach it to each hook so it follows a smooth curve rather than sharp angles.
Give the whole thing one final look from where your photos will actually be taken, since garlands can look different depending on the angle.
Common Mistakes That Ruin a DIY Garland
Even with the right supplies, a few small errors can make a homemade garland look off. Knowing these ahead of time saves a lot of frustration.
Overinflating balloons is the most common mistake. Fully stretched balloons look stiff and can pop more easily when squeezed together on the strip. Aim for that 90% mark instead.
Skipping the filler balloons is another one. Without them, a garland looks gappy and thin, no matter how many big balloons you use. The fillers are what create that dense, professional texture.
Building indoors near air conditioning vents or outdoors in direct sun both shorten how long your garland looks good. Air-filled garlands typically hold their shape for 3 to 5 days indoors in normal conditions, but that drops to just 6 to 12 hours outdoors in heat or direct sunlight — worth remembering if you’re setting up in Karachi’s humidity or under an open Lahore sky in summer.
Finally, using weak adhesive hooks is a recipe for disaster. A full garland is heavier than it looks, so always use hooks rated for at least 3 lbs each, and don’t skimp on the number of hooks.
Conclusion
Once you’ve built one balloon garland, the whole process feels a lot less intimidating the next time around. It really comes down to a few basics: plan your color ratio, don’t skip the filler balloons, and give yourself more strip length than you think you need.
Whether you’re setting up a small birthday corner or a full backdrop for a bigger celebration, a well-built garland is one of the highest-impact, lowest-cost decorations you can make yourself.
At Decorish.pk, you’ll find balloon decorating strips, glue dots, chrome and pastel balloon packs, and adhesive hooks — everything you need for your first garland, delivered nationwide, with same-day delivery available in Islamabad and Rawalpindi if you’re planning something last-minute.
FAQs
- Do I need helium to make a balloon garland?
No. Garlands are built with air-filled balloons using a hand pump, since they don’t need to float — this also makes them last longer than helium balloons.
- How many balloons do I need for a balloon garland?
For a lush, full garland, plan on roughly 16–20 eleven-inch balloons per foot, plus filler balloons in a smaller size to close gaps.
- How long does a homemade balloon garland last?
Indoors, an air-filled garland typically holds its shape for 3 to 5 days. Outdoors in heat or direct sun, that drops to around 6 to 12 hours.
- What can I use instead of hot glue for filler balloons?
Low-temperature glue dots work best. Regular hot glue is too hot and will pop latex balloons on contact.
- Can I make an arch instead of a straight garland?
Yes. Use a slightly longer strip than you’d need for a straight line, and shape it gradually as you attach it to hooks along a curved path.
- What size hooks do I need to hang a garland?
Use adhesive hooks rated for at least 3 lbs each, placed every 2 to 3 feet along the garland’s length.
- Why does my garland look thin or gappy?
You’re likely missing filler balloons. These smaller balloons tucked into the gaps between larger ones are what create a full, textured look.
- Where can I buy balloon garland supplies in Pakistan?
Decorish.pk offers complete garland kits, decorating strips, glue dots, and balloons in various finishes, shipped nationwide.